
I’ve had some requests for a tutorial on pine needle baskets, so here goes.
This tutorial is dedicated to my dear friend Kate, a stitch witch extraordinaire. Thank you, Kate, for your support and friendship <3 .
This will be the first in a series where I’ll share tutorials, traditional craft and my wild-crafting research in a practical, hands-on way.
After this, all posts in this series will be for my paid subscribers. Thank you so much for your support of this project.
If you would like me to send a kit of pine needles, thread and a needle, let me know and we can work it out.
Thank you for joining me!
-Lena
❈
In honor of the spiraling magic of the world weaving herself: the Fibonacci spiral, the caracol, the ripples spreading across water, the spider as she weaves her web. The wheel is always turning, turning. May you find some rest and solace in the slow rhythm of stitching and arranging the coils.
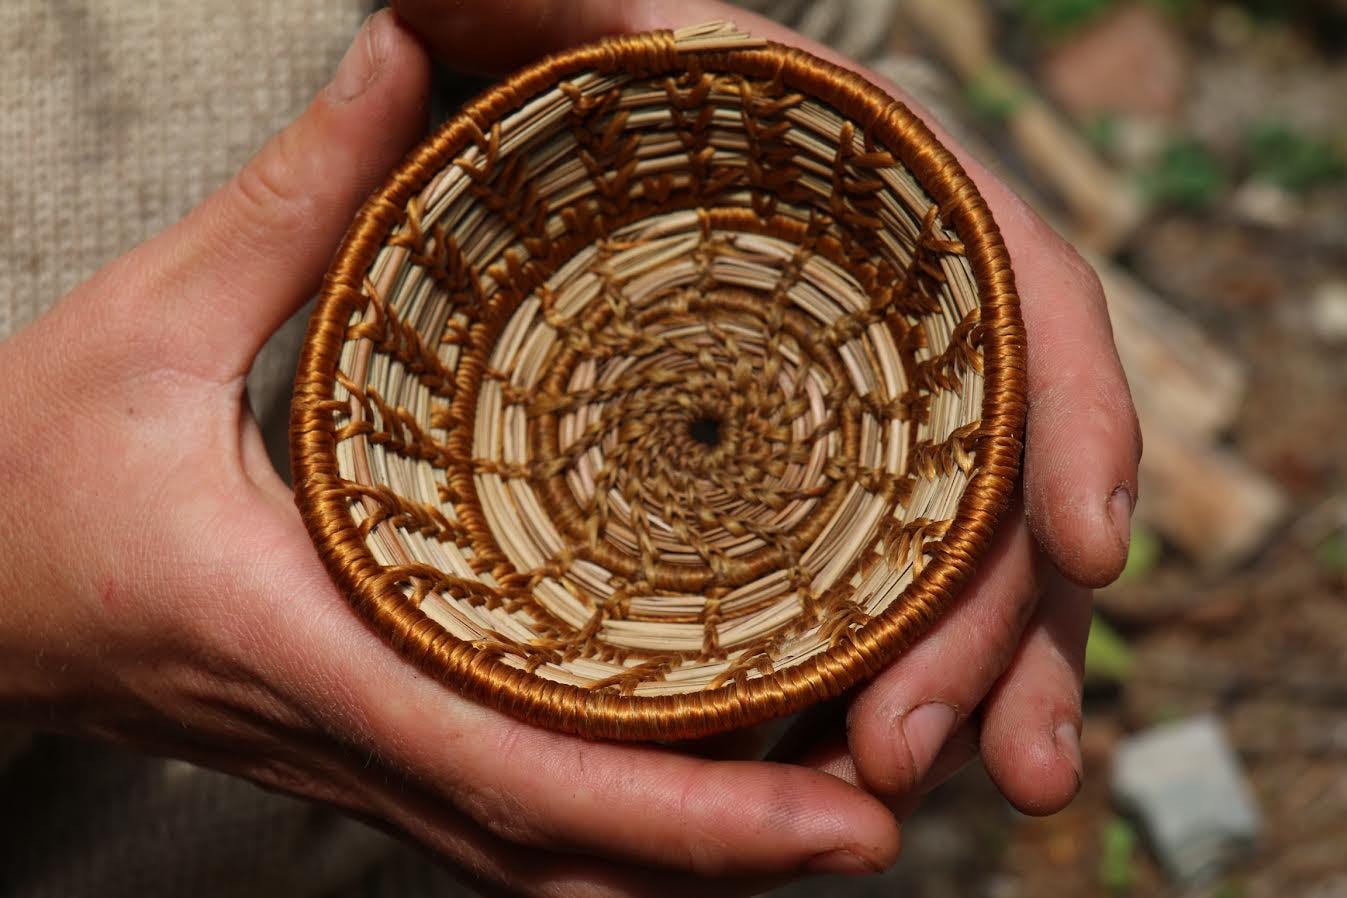
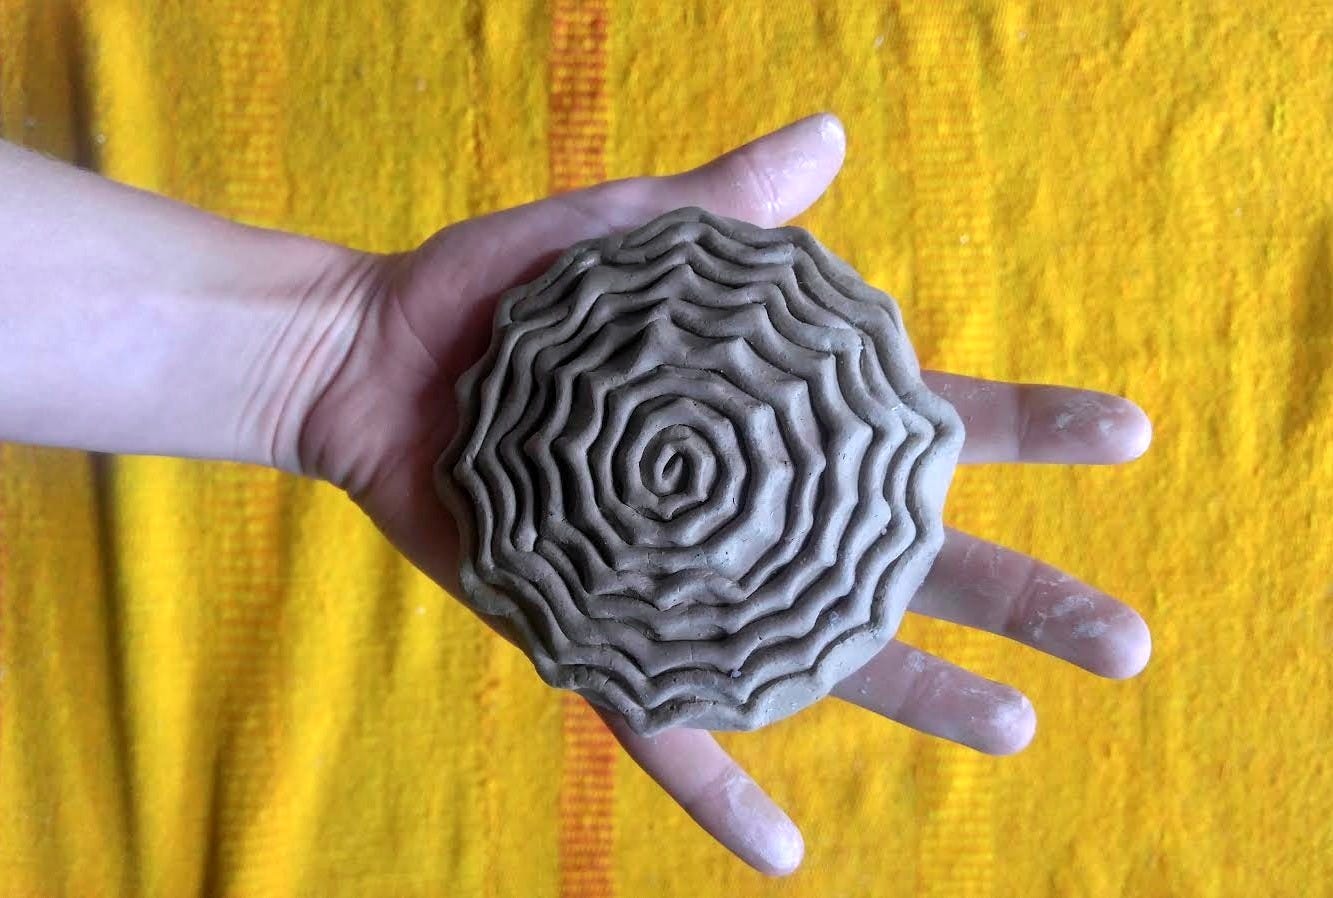
Coiling is one of the oldest and most widespread methods of basket making in human history, and I find it fascinating that this is true not only in baskets, but also in clay pots. Both technologies profoundly nourished our ancestors.
There is an ancient wisdom held in the rhythm.
I will give a brief history of pine-needle basketry to honor the traditions and generations of makers who have carried this knowledge forward. So many contemporary pine-needle basket tutorials leave this history out, and I feel it is important to acknowledge the roots of the craft and the people who shaped it, even where that history is complex.
This is the beauty of learning craft from each other. Craft belongs to a living lineage. Techniques pass from hand to hand, accumulating stories, adaptations, and relationships along the way. When we learn not only how something is made but something of the history it carries, we gain so much more than a pretty picture on a Pinterest board.
Then, I’ll provide written instructions along with spoken instruction and videos, for making a simple contemporary pine-needle basket as it was taught to me.
Please don’t hesitate to ask questions in the comments.
This is a living craft, and there is always more to learn.
❈
The History- Culture and Tradition
This particular basket style is North American in origin. A la Americana, it belongs to a much more tangled history.
Across the southeastern United States, Indigenous peoples developed sophisticated basket making traditions using the materials of their homelands: river cane, grasses, palmetto, bark, splints, and, in some communities, the long needles of southern pines. Pine-needle basketry remains a living tradition among makers from Nations including the Coushatta, Seminole, Choctaw, and Cherokee. If you are interested in learning traditional indigenous pine-needle basketry, please seek teachers who carry these traditions.
Enslaved West Africans brought highly developed basketry knowledge to the coastal South, particularly techniques connected with rice cultivation. Their descendants adapted those traditions to the plants of the Lowcountry, giving rise to the Gullah Geechee sweetgrass basket tradition that continues today.
Exactly how these traditions encountered and influenced one another is difficult to untangle. Native and African peoples lived, worked, traded, and formed families together in the South. Makers carried knowledge forward, learned from one another, and adapted techniques to changing circumstances and the materials available around them. Pine needles, sweetgrass, palmetto, cane, cotton thread, raffia, and other materials entered the story at different times and in different communities.
For example, it is common to use raffia to stitch pine needle baskets together. Raffia itself is an African plant fiber. Long used for textiles, cordage, and basketry in Africa and Madagascar, it later became an international trade material, shipped in large quantities to Europe and North America for tying, packing and craft and basket making.
Euro-American makers eventually took up pine-needle coiling as well, adapting it again with materials such as cotton thread and developing their own expressions within the broader tradition. By the twentieth century, decorative stitches such as wheat and fern stitch had become familiar elements of contemporary pine-needle basketry.
Pine needle basketry is a part of a living landscape of coiled basketry, and to me it speaks to the nature of craft. Humans will always learn from each other and admire each other. Here in the Americas, that exchange has taken place within both extraordinary creativity and extraordinary violence.
A basket is essentially a vessel.
A vessel of history, migration, survival, exchange, necessity, and relationships. Baskets carry us all. The important distinction here, is to not mistake learning the visible object for inheriting the cultural knowledge behind it.
The basket I’m showing here is a simple contemporary pine-needle coil that I learned as an “American craft tradition”. I was lucky to have a teacher that was also aware of the broader cultural history a pine needle basket carries. I’m not attempting to reproduce named ceremonial forms or culturally specific designs belonging to any particular Nation or community.
❈
Making a Pine Needle Basket
The Materials:
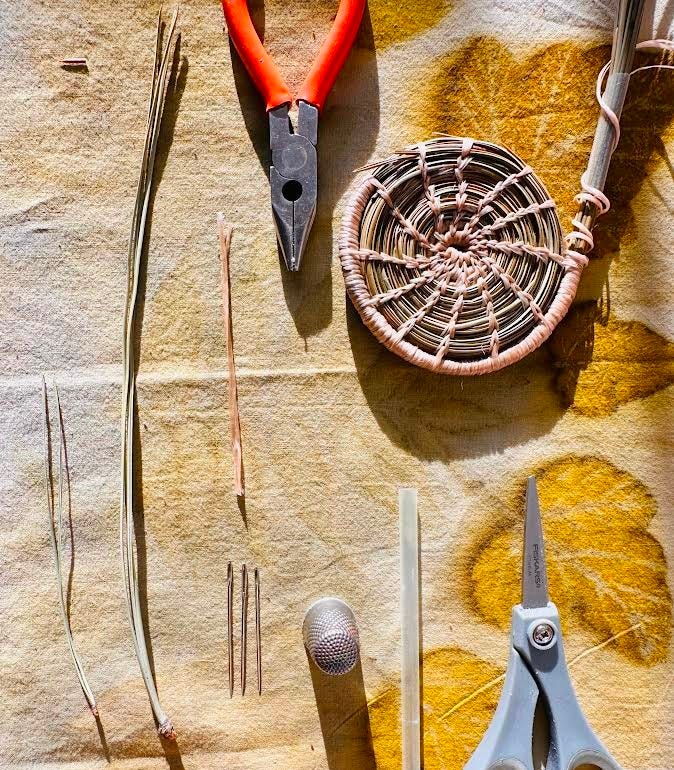
Pine needles
Cotton thread that splits- embroidery floss or artificial sinew (waxed flat cotton thread). The splitting quality will help us weave our patterns. You can make a similar stitching effect with raffia.
A darning needle- a needle that is strong enough to not bend under pressure, and with an eye large enough for our thread.
A thimble- can be helpful for pushing a needle through a stubborn coil
A straw cut to a 1”- 1.5” length- used as a gauge to keep coils even and organized
Scissors- for cutting thread and loose needles
Pliers- can be helpful for pulling a needle through a stubborn coil. A piece of leather for gripping the needle can work too.
Stitching with Artificial Sinew
There are a few tricks to stitching with artificial sinew.
Pine-needle baskets are built through stitching, so many of the familiar frustrations of hand sewing still apply: tangled thread, missed stitches, and….. knots.
Artificial sinew has another quirk: it is made from many fine fibers that can begin to separate as you work. A few strands may catch on a pine needle, snag in the coil, or fail to pass cleanly through the eye of your needle.
I like to keep a little wax nearby so I can smooth and re-wax the thread when it begins to fray. Run the sinew lightly across the wax, then smooth the fibers back together with your fingers.
Your pine needles will be damp while you work, but try to keep the sinew itself as dry as possible. Brief contact with wet needles is fine, but avoid letting the thread sit in your soaking water. Too much moisture can reduce the tack of the wax and make the individual fibers more likely to separate.
Artificial sinew is also more likely to split when a stitch is pulled out and sewn again. Try to place your stitches carefully the first time, and when you do need to undo one, pull the thread back gently rather than yanking it through the coil.
If your sinew begins to look fuzzy or separated, stop, smooth the fibers together, add a little wax, and continue.
Due to the wax, artificial sinew is also slippery. Tied knots generally slip. The best thing to do with artificial sinew is to tuck the tail. Tie a knot anyways to secure the stitch or the thread, and leave long enough of a tail to weave into the basket. The tight weave structure is truly what holds everything together.
❈
Step One: Collecting the Needles
Pine needles are what we’ll use for this basket, but one of the beautiful things about coiling is that the technique is not limited to pine. People around the world have made coiled vessels from grasses, rushes, sedges, straw, roots, vines, bark, fabric, and countless other flexible materials.
For this tutorial I am using my local Ponderosa Pine, or bull pine. The sweet smell of this pine is intoxicating. On a hot day, the bark smells like butterscotch. The needle’s fragrance sings brighter notes of lemon bars with a graham cracker crust. The sweetness of this tree sustained the peoples of the Flathead Valley; the Qlispe, Ksanka and Ktunaxa. Some old bull pines still bear the scarring of people collecting the sugary sap for sustenance.
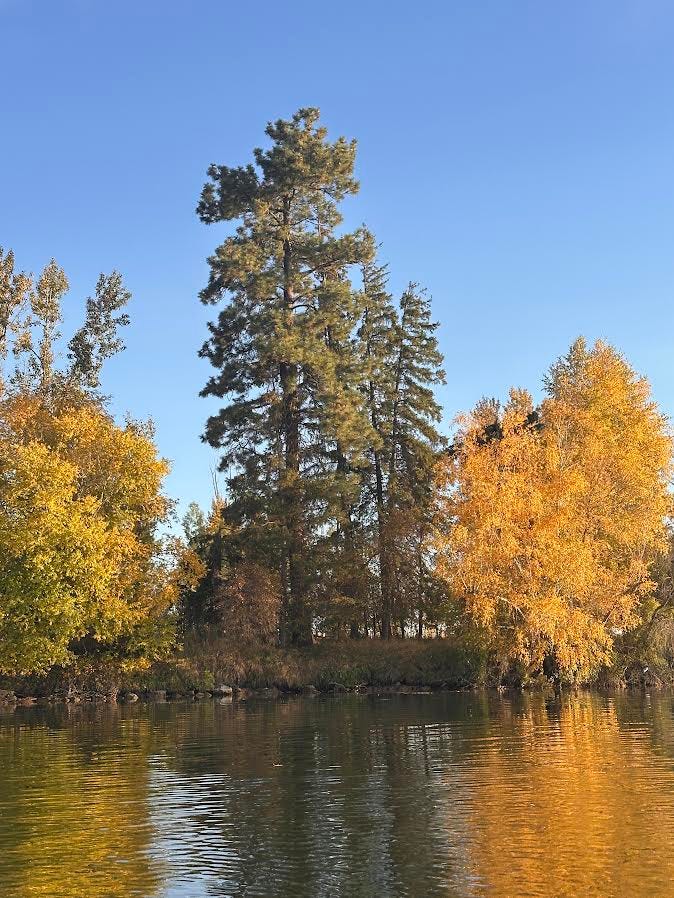
The ponderosa’s needles are long and robust, which is perfect for making larger baskets. The longer the needles the larger the coil.
Smaller, more delicate baskets can be made from pine species like the Eastern White Pine.
Generally, the smallest pine needle for weaving should be about 4 inches. Any shorter than that, and the coiling can be very unruly. The delicate needles need to be added in bulk to create the walls of the basket. As they coil they will lose length and taper quickly, so more will need to be added with your stitching. If you are beginning this type of basketry, I suggest a minimum needle length around 5 inches.
The needles should be dried before re-hydrating them to stitch. Fresh green needles will lose moisture, shrink and leave your stitching loose.
I like to collect green needles for a couple reasons. The first, is that dead needles on the ground can be rotting. If I harvest them alive and cure them I don’t need to worry about fungus. Second, I will look for fallen trees or branches that have exceptionally long needles. Mature ponderosa trees can be hard to climb.
The needles I’m weaving with are about 9.5 inches.
If you do collect needles from the ground, simply boil them to kill any rot or fungus. Try to find the more pristine needles that have as few black spots or markings as possible.
To cure green needles I simply house them loosely in a paper bag in a dry spot. If you leave them spread out instead, I would keep them out of direct sunlight. They need to dry for a couple of weeks.
❈
Step Two: Soaking and Removing Bundle Sheaths
I soak my needles in a tupper-ware or baking dish that can hold their length. I pour boiling water over the needles and soak them for about a half hour. Sometimes, if the needles are thick, I will boil water again and change out the water after 15-20 minutes or so.
The needles are ready when they are pliable- when they can bend around my finger without breaking. It’s important to prepare your first needle coils in this way. Bending them around a finger will ask them to coil, as the center of the basket is the tightest.
You can over-soak needles, but it is not a catastrophe. Over-soaked needles will become soft and difficult to add to the straw gauge. If your needles are soft, simply leave them out to stiffen up a bit.
You can store soaked needles wet in a damp paper towel or cloth, and if overnight, in a plastic bag or container. It is important to note that needles can get a little funky after days of this kind of storage, especially if mold or fungus were already present.
A pine’s needles grow in little bundles called fascicles, and the papery or scaly wrap around the base of that bundle is the fascicle sheath. It’s made from modified scale leaves. I always pop off the sheath with a finger and thumbnail, instead of cutting them. The needles will stay connected and will be much easier to weave.
Of course you can keep some of the sheaths on for decoration too!
I like to remove bundle sheaths as my needles are re-hydrating. It gives me something to do while I wait.
❈
Step Three: Wrapping and Coiling the Center
We’ll begin the center of our basket by wrapping a bundle of pine needles together.
This creates the thickness of our basket.
Because the ponderosa’s needles are large and long already, I am starting my basket with three to four needles. About 5 mm diameter. Ultimately I will stitch the walls of my basket with six to seven needles, at about 6-6.5 mm diameter.
If your pine needles are more fine than mine, it might take more needles to achieve a similar thickness. A 5 mm diameter is the same as a size 10.5 knitting needle, or a drinking straw.
I start with less needles in my center for a few reasons:
I like to taper the start of my basket so the center isn’t chunky.
A more fine wrap of needles is easier to coil tightly and easier to stitch. The more pine needles you have in this step, the more difficult it will be to push a needle through the coil. It requires greater hand strength.
If your needles are short, between 4-5 inches, adding needles as you wrap this initial bundle will be important. Adding needles gives you more length and helps you keep a consistent thickness. The following step can be really challenging, so it’s good to be proactive and add needles sooner, rather than later.
When you add needles, be sure to add them one or two at a time. This gradual introduction will ensure an even increase in diameter and avoid lumps.
Tie an overhand knot each time you add a new needle to tightly secure the wrap.
Start by tying a slip knot at the end of your needle bundle, about a 1/4 of an inch from the fascicle. If you tie your knot too close to the end, your wrap will slip off of the end and make a tangled mess.
Wrap your needles tightly, and by placing your wraps next to each other. The direction of your wrap is important and based on your dominant hand. Hold the needle bundle close to the fascicle end in your dominant hand and wrap the bundle in the direction away from you with your non-dominant hand. The direction should be outwards as the thread passes the top of your bundle.
If you’re just beginning with pine needle weaving, it’s very helpful to tie slip knots every 4-5 wraps. This secures the wraps and keeps them from slipping everywhere as we bend the first coil.
We will wrap enough length to create our first coil. You can do this by pinching and rolling your pine needles to create the tight spiral at the center of the basket. When the end of your wrap meets the beginning in one full circle, you’ve completed your first wrap.
Tie a slip knot at the end of the wrap.
Adding Needles
We will all need to know how to do this eventually. If you’re working with shorter pine needles, you might need to begin adding new needles during this first wrap.
Introduce new needles gradually: no more than a few at a time. If your needles are especially large or thick, adding them one at a time may work best.
The piece of straw helps us monitor the thickness of our bundle. It is our gauge.
As you work, pay attention not only to where you are stitching, but also to the loose ends of the pine needles extending ahead of your coil. Watching those ends will help you anticipate when your bundle is beginning to thin and when it is time to add more needles.
If we add needles gradually and consistently, the working end of our pine-needle bundle should stay close to the diameter of our gauge.
To add a new pine needle, slide the fascicle end through the center of your straw and into the existing bundle. Sometimes it will slip in easily; other times you may need to coax it into place.
Look at the base of the working bundle, just beyond the last stitch wrapped around the needles. If necessary, gently part the bundle to create a small opening in the center.
Guide the fascicle end of your new needle into that opening and tuck it snugly into the middle of the bundle. Your existing stitch may hold it in place immediately; if not, the next stitch usually will.
Try to keep newly added fascicles buried inside the bundle. If they sit along the outside, they can create bumps or interrupt the visual illusion of one continuous coil.
❈
Step Four: Stitching the Base, Splicing Thread
Starting the Center
This is the most difficult part of the entire basket. Once you get through it, stitching becomes much easier.
We’re going to roll the wrapped end of our pine-needle bundle into a very small, tight spiral and stitch that spiral together.
Pinch and Roll
Pinch the end of your wrapped section of the pine needle bundle between the thumb and finger of your non-dominant hand. The fascicle end should be facing your dominant hand.
With your dominant hand, bend the fascicle end to begin forming the center of the basket.
Pinch the fascicle end and the bend with your dominant hand. Don’t let go! Start to wrap your needles with your non-dominant hand.
As you make each little bend, pinch it beneath the same thumb and finger that are holding the fascicle. Think:
bend, pinch, roll
bend, pinch, roll
Keep working your way around until the wrapped bundle makes one full turn around the fascicle end.
Pinch everything tightly together.
Your fascicle should now be tucked into the middle of a tiny circular coil, inside the center of the spiral.
Secure the Center
Now we need to stitch that tiny spiral together. Keep pinching, don’t let go.
Insert your sewing needle from the inside of the center coil and within the first few wraps. Pierce through the outer coil that is stacked right next to the fascicle end. Pull the thread snug.
This first stitch can be difficult. The wrapping has compressed the pine needles into a very dense bundle. That tightness is good, it will give us a strong center, but it can be hard on your hands.
Use your thimble or piece of leather to push the needle, and pliers to grip and pull it through if necessary. A needle with a very large eye will be harder to pull through this tightly wrapped center.
Take your time. Breathe. The first coil often takes a few tries.
Once the rest of the center is stitched, the basket becomes much easier to handle.
Another Option: Start With a Base
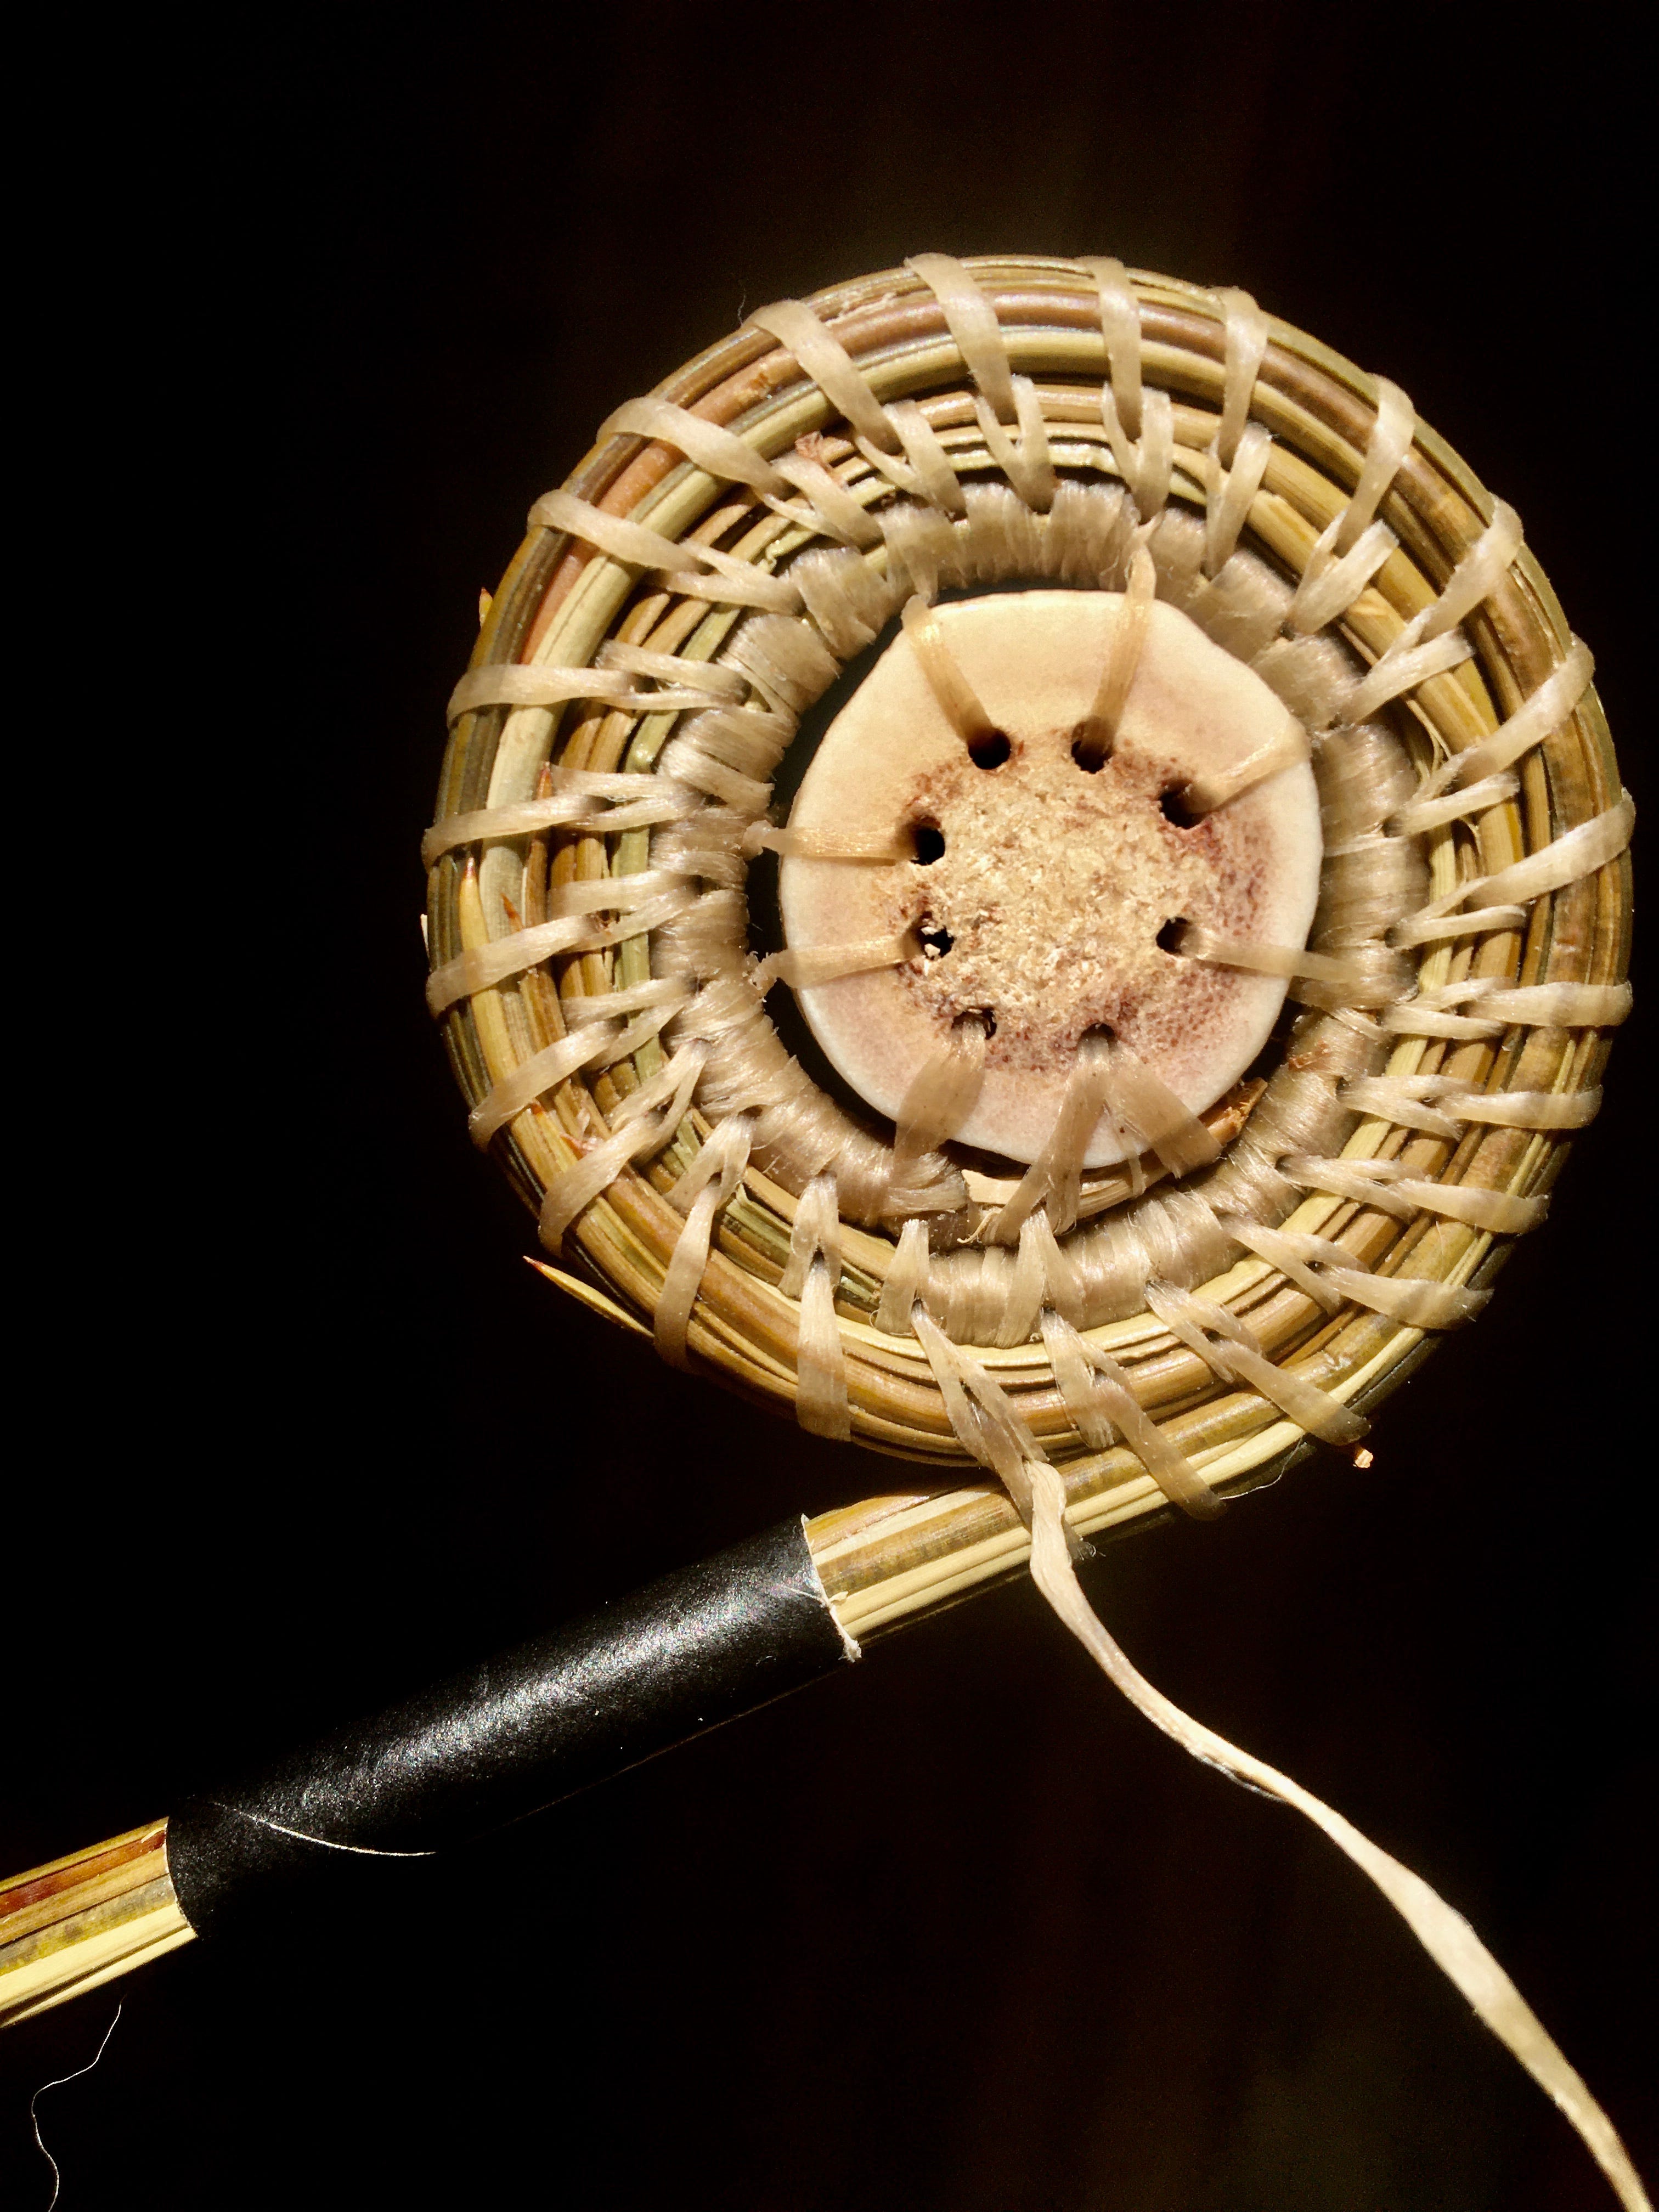
If making the tiny center coil feels frustrating, you can also begin with a prepared base.
A small piece of antler, a wooden disk, or a wood “cookie” with holes drilled around the edge gives you ready-made places to anchor your first pine-needle coil.
Orienting the Basket
Once the fascicle end is secured inside the center, it’s time to begin stitching the next coil into place.
This is also where your basket develops a front and a back.
Hold the little spiral between the thumb and finger of your non-dominant hand, with the loose pine needles resting on top of the coil and pointing outward, away from your fingers.
With the method I’m teaching here:
right-handed makers will usually work around the basket counterclockwise, while the basket itself spins clockwise.
left-handed makers will usually work around the basket clockwise, while the basket itself spins counterclockwise.
In both cases the thread should pass from the back and your needle will stitch through the front.
The side facing you is now the front of your basket.
As you stitch, your thread will come from behind the basket, wrap up and over the pine-needle bundle toward you, and then pass through the basket from front to back as your needle pierces the coil.
You don’t need to keep holding the basket in your dominant hand. This is simply a way to establish which side is the front before we continue.
Wrap the Second Coil
I like to wrap this second coil as well.
It gives me one last chance to tidy the center, and if you’re working with short pine needles, the wrapping helps secure newly added needles while the basket is still taking shape.
Each stitch we make around this coil will also create an anchor point for our later stitching pattern.
For now, keep your stitches fairly close together; try to place your stitches about an 1/8 inch (roughly 1/4 cm) apart. As the spiral grows wider, those stitches naturally spread farther apart. Giving ourselves plenty of anchor points will ensure our basket weaves tightly.
Bring your thread from behind the basket and wrap it up and over the pine-needle bundle toward you.
Continue wrapping until you’re about 1/4 inch from your previous stitch.
Wrap over the bundle once more, then insert your needle through the center coil and pull the thread snug.
Continue wrapping and stitching around the spiral until you return to the place where the fascicle end meets your first stitch.
At this point, stop and feel the basket.
The center should feel compact and sturdy.
The hardest part is over!
Splicing Thread
Artificial sinew is waxed and fairly slippery, and knots don’t always hold. Whenever you start or end a thread, leave a generous tail. We’re going to tuck those tails into the pine-needle bundle so that the following stitches trap them securely inside the basket. The tight weave structure is truly what holds everything together.
I teach a top-knot method, because I believe it’s the most secure. You can add a dab of glue on your knot to ensure that it won’t slip out.
To splice in a new thread, tie the end of your new thread to the old thread with a square knot: right over left, then left over right. As you tighten the knot, position it directly on top of the pine-needle coil.
The next coil will sit over the knot and hide it completely.
Lay both loose thread ends alongside your pine needles so that they become part of the bundle. As you continue stitching, each new stitch will trap those tails inside the basket, helping prevent them from slipping free.
Complete your next stitch as if your thread had never ran out.
❈
Step Five: Wheat Stitch
I love this stitch. It’s beautiful, and it really emphasizes the spiraling structure of the basket.
To make the wheat stitch, bring your thread from behind the basket and wrap it over the pine-needle bundle toward you. Instead of piercing an empty space in the coil below, insert your needle directly through the center of the adjacent stitch from the previous round.
Your needle splits that stitch in half, creating the characteristic wheat pattern. For this reason, it is also called a split stitch.
The trickiest part is understanding where your needle needs to emerge on the back of the basket.
In this first round of stitching (to make the third coil), the needle will be in that T-shape, 90 degree angle. It will exit the back of the basket in the same stitch it pierced.
After that third coil is finished, we’re going to change the angle of our needle to exit the back of the basket in the next adjacent stitch.
This creates a wonderful spiraling pattern.
As you pierce the basket from the front, think about the needle in two directions at once:
Across the coil, your needle should pass roughly perpendicular to the pine-needle bundle. If you could look at the bundle and needle in cross-section, they would make a T shape.
Along the spiral, however, tip the point of your needle slightly forward so that it emerges through the middle of the next adjacent stitch on the back, splitting the thread.
That slight forward angle sets you up for the next stitch.
As we build the base of the basket, each new coil will sit beside the previous one, creating a flat spiral. Later, when we begin forming the walls, we’ll gradually place the new coil on top of the one below it instead.
Stitching Tension
The coiling method is held together by a continuous thread stitched into the basket. As with sewing, tension is very important. Proper tension ensures that the pattern stays neat and tidy, and that the basket retains density and tensile strength.
You can pull your thread too tight. Pine needles are delicate, especially while they are wet. Pulling the thread too tight can break and bruise your needles, and pull too much at your stitches.
Not pulling hard enough though, leaves loose stitches
❈
Step Six: Wrapping Stitch
As the basket spirals outward, you may reach a point where your needle can no longer comfortably reach the next stitch and the gaps between your coils begin to widen.
This can be especially tricky if you’re working with shorter pine needles.
At this point, it helps to reset your stitches so they can pull the basket tightly together again without making the pattern look uneven.
You have a couple of options.
You can add an extra stitch into the open space between two wheat stitches. This gives you another anchor point and helps close the growing gap.
Or, if you want a cleaner visual reset, you can wrap an entire section, or even a full coil, and begin stitching into that wrap instead. The wrapped section creates a fresh row of evenly spaced places for your stitches to land.
I especially like the second option because it gives the basket a natural transition point. You can continue with the same thread, or use the wrapped coil as an opportunity to introduce a new color.
Think of it as giving your spiral a fresh start.
To start the wrap, we’re going to change the angle of our needle.
Instead of angling the needle forward toward the next stitch, insert it through the next adjacent stitch and straight through the basket so that it exits through the stitch directly behind it on the back side.
In cross-section, your needle should now pass straight through the basket, in that T-square, 90 degree angle, to the face of the basket.
Pull it tight. Begin wrapping your pine needle coil, stacking the threads next to each other. Your thread should be wrapping towards you. Once you reach the next stitch, pierce the coil straight through the basket. Your needle should exit directly behind the stitch in the back of the basket.
Complete one full coil of the wrap stitch.
❈
Step Seven: Stitching Walls
Coil placement creates the form; stitching secures the form.
Until now, we’ve been building the basket outward in a flat spiral. Each new pine-needle bundle has rested beside the previous coil, and our stitches have passed through the basket roughly parallel to the plane of the base.
To begin building the walls, we’re going to change where the new coil sits.
Instead of placing the pine-needle bundle directly beside the previous coil, begin rolling it upward so that it sits partly (or completely) on top of the coil below.
The position of the bundle determines the angle of your basket wall.
If you stack the new coil directly on top of the previous one, your walls will rise at roughly 90 degrees from the base.
If you want the basket to flare outward, position the new bundle at the angle of your desired shape. For example, placing it at roughly a 60-degree angle from the base will create a more gently sloping wall.
As the position of the coil changes, the angle of your stitching will change with it. Placing our stitches close to the bottom of the pine needle bundle on each side of the basket will secure the position of our coil.
❈
Step Eight: V Stitch
The V-stitch can look a little like an enlarged wheat stitch, but the pattern is constructed differently. Each V is made from two stitches that share the same anchor point.
The first stitch reaches forward along the coil to the next adjacent stitch. This creates the slanted side of the V:
\
The second stitch returns to that same anchor point and stitches directly into the stitch you just made. This creates a more upright stitch:
|
Together, the alternating reaching and upright stitches create a repeating pattern:
\| \| \| \|
To keep the pattern spiraling consistently around the basket, always pierce the reaching stitch—the slanted \ stitch—on the next round.
This is true on both the front and back of the basket.
It can feel confusing at first, especially when you turn the basket over. Instead of trying to remember which stitch you should pierce on whichever side, simply look for the slanted reaching stitch. If you keep piercing that stitch, you will continue following the pattern.
Reversing the V-Stitch
You can reverse the direction of the V-stitch by changing which face of the basket you stitch into.
Throughout this tutorial, we’ve been piercing the basket from the front to the back. This makes the reaching stitch lean in one direction.
To reverse the V pattern, turn the basket over and begin piercing from the back to the front instead.
The construction of the stitch stays the same, but the visible slant reverses.
If you switch faces intentionally, you can use this change in direction as part of your pattern design.
Step Nine: Fern Stitch & Stitching into Thread
The fern stitch is a lot like the V stitch. In order to make the fern stitch you actually have to complete a full coil of V stitches.
A full coil of V stitches looks like this:
| \| \| \| \| \| \| \| \| \| \| \|
Once that coil is complete, we’re going to work backward around the coil, reversing the direction of the slanting stitch.
This backward pass will look like:
|/ / / / / / / / / / / / / / / / / / /
As you work backward, anchor each new slanting stitch into the upright | stitch of the V below it.
As the backward stitches overlay the V-stitches, the fern pattern begins to appear:
|/ \|/ \|/ \|/ \|/ \|/ \|/ \|/ \|/ \|/ \|/ \|/
Starting the Backward Pass
You’ll begin your backward pass at an incomplete V. That is exactly what we want.
At the end of your forward V-stitch row, make one upright | stitch directly into the last slanted stitch you completed.
Your row will look like this:
| \| \| \| \| \| \| \| \| \| \| \|
Now reverse direction and begin working back around the basket.
Your first backward stitch begins the fern:
|/ \| \| \| \| \| \| \| \| \| \| \|
And as you continue stitching:
|/ \|/ \|/ \|/ \| \| \| \| \| \| \| \|
Continue working backward until you have stitched over the entire V-stitch row.
Your completed fern row will look like this:
|/ \|/ \|/ \|/ \|/ \|/ \|/ \|/ \|/ \|/ \|/ \|/
Finishing the Fern Row (and Starting a New One)
When you reach the beginning again, wrap your final backward stitch around the loose ends of the pine-needle bundle.
You may need to pass the pine-needle bundle through the loop of that final stitch before pulling it tight.
Anchor that final backward stitch into the upright | stitch of the V below.
Now we need to make one final slanting stitch. This stitch does two jobs at once: it completes the last fern motif and begins the next row of V-stitches.
Make a forward-reaching stitch:
That first forward stitch in the next coil will look like this:
\
When it overlays the beginning and ending stitches of the fern row, it closes the final fern and gives you the first slanted stitch of your next V-stitch row.
Your new V row will begin to look like:
\
|/ \|/ \|/ \|/ \|/ \|/ \|/ \|/ \|/ \|/ \|/ \|/
To make the next round, begin with an upright | stitch to establish the V pattern in your new coil.
Then make your slanted reaching stitch \, anchoring it into the upright stitch | of the fern pattern in the coil below.
Then complete the V stitch in that same anchor point.
Continue repeating this pattern around the basket.
Your new V-stitch row will look like:
| \| \| \| \| \| \| \| \| \| \|
\|/ \|/ \|/ \|/ \|/ \|/ \|/ \|/ \|/ \|/ \|/
And as you make a backwards pass:
|/ \|/ \|/ \|/ \|/ \| \| \| \| \| \|
\|/ \|/ \|/ \|/ \|/ \|/ \|/ \|/ \|/ \|/ \|/
Step Ten: Finishing the Basket
(Video coming soon!) I wanted to get this tutorial into your hands sooner rather than later, so I’ll be updating this post with a video showing how I finish a basket.
I usually finish my baskets with a wrapped rim, then hide the tail by stitching it back underneath the wrapping. This is a common way to finish a pine-needle basket, though the rim can be finished in many different ways.
The wrapping material can vary depending on the basket and the effect you want.
Sometimes I use thread or sinew, and sometimes I like to introduce another material entirely. For example, I extended this gourd basket with pine needles and finished the rim with bark-tanned deer leather I tanned myself.
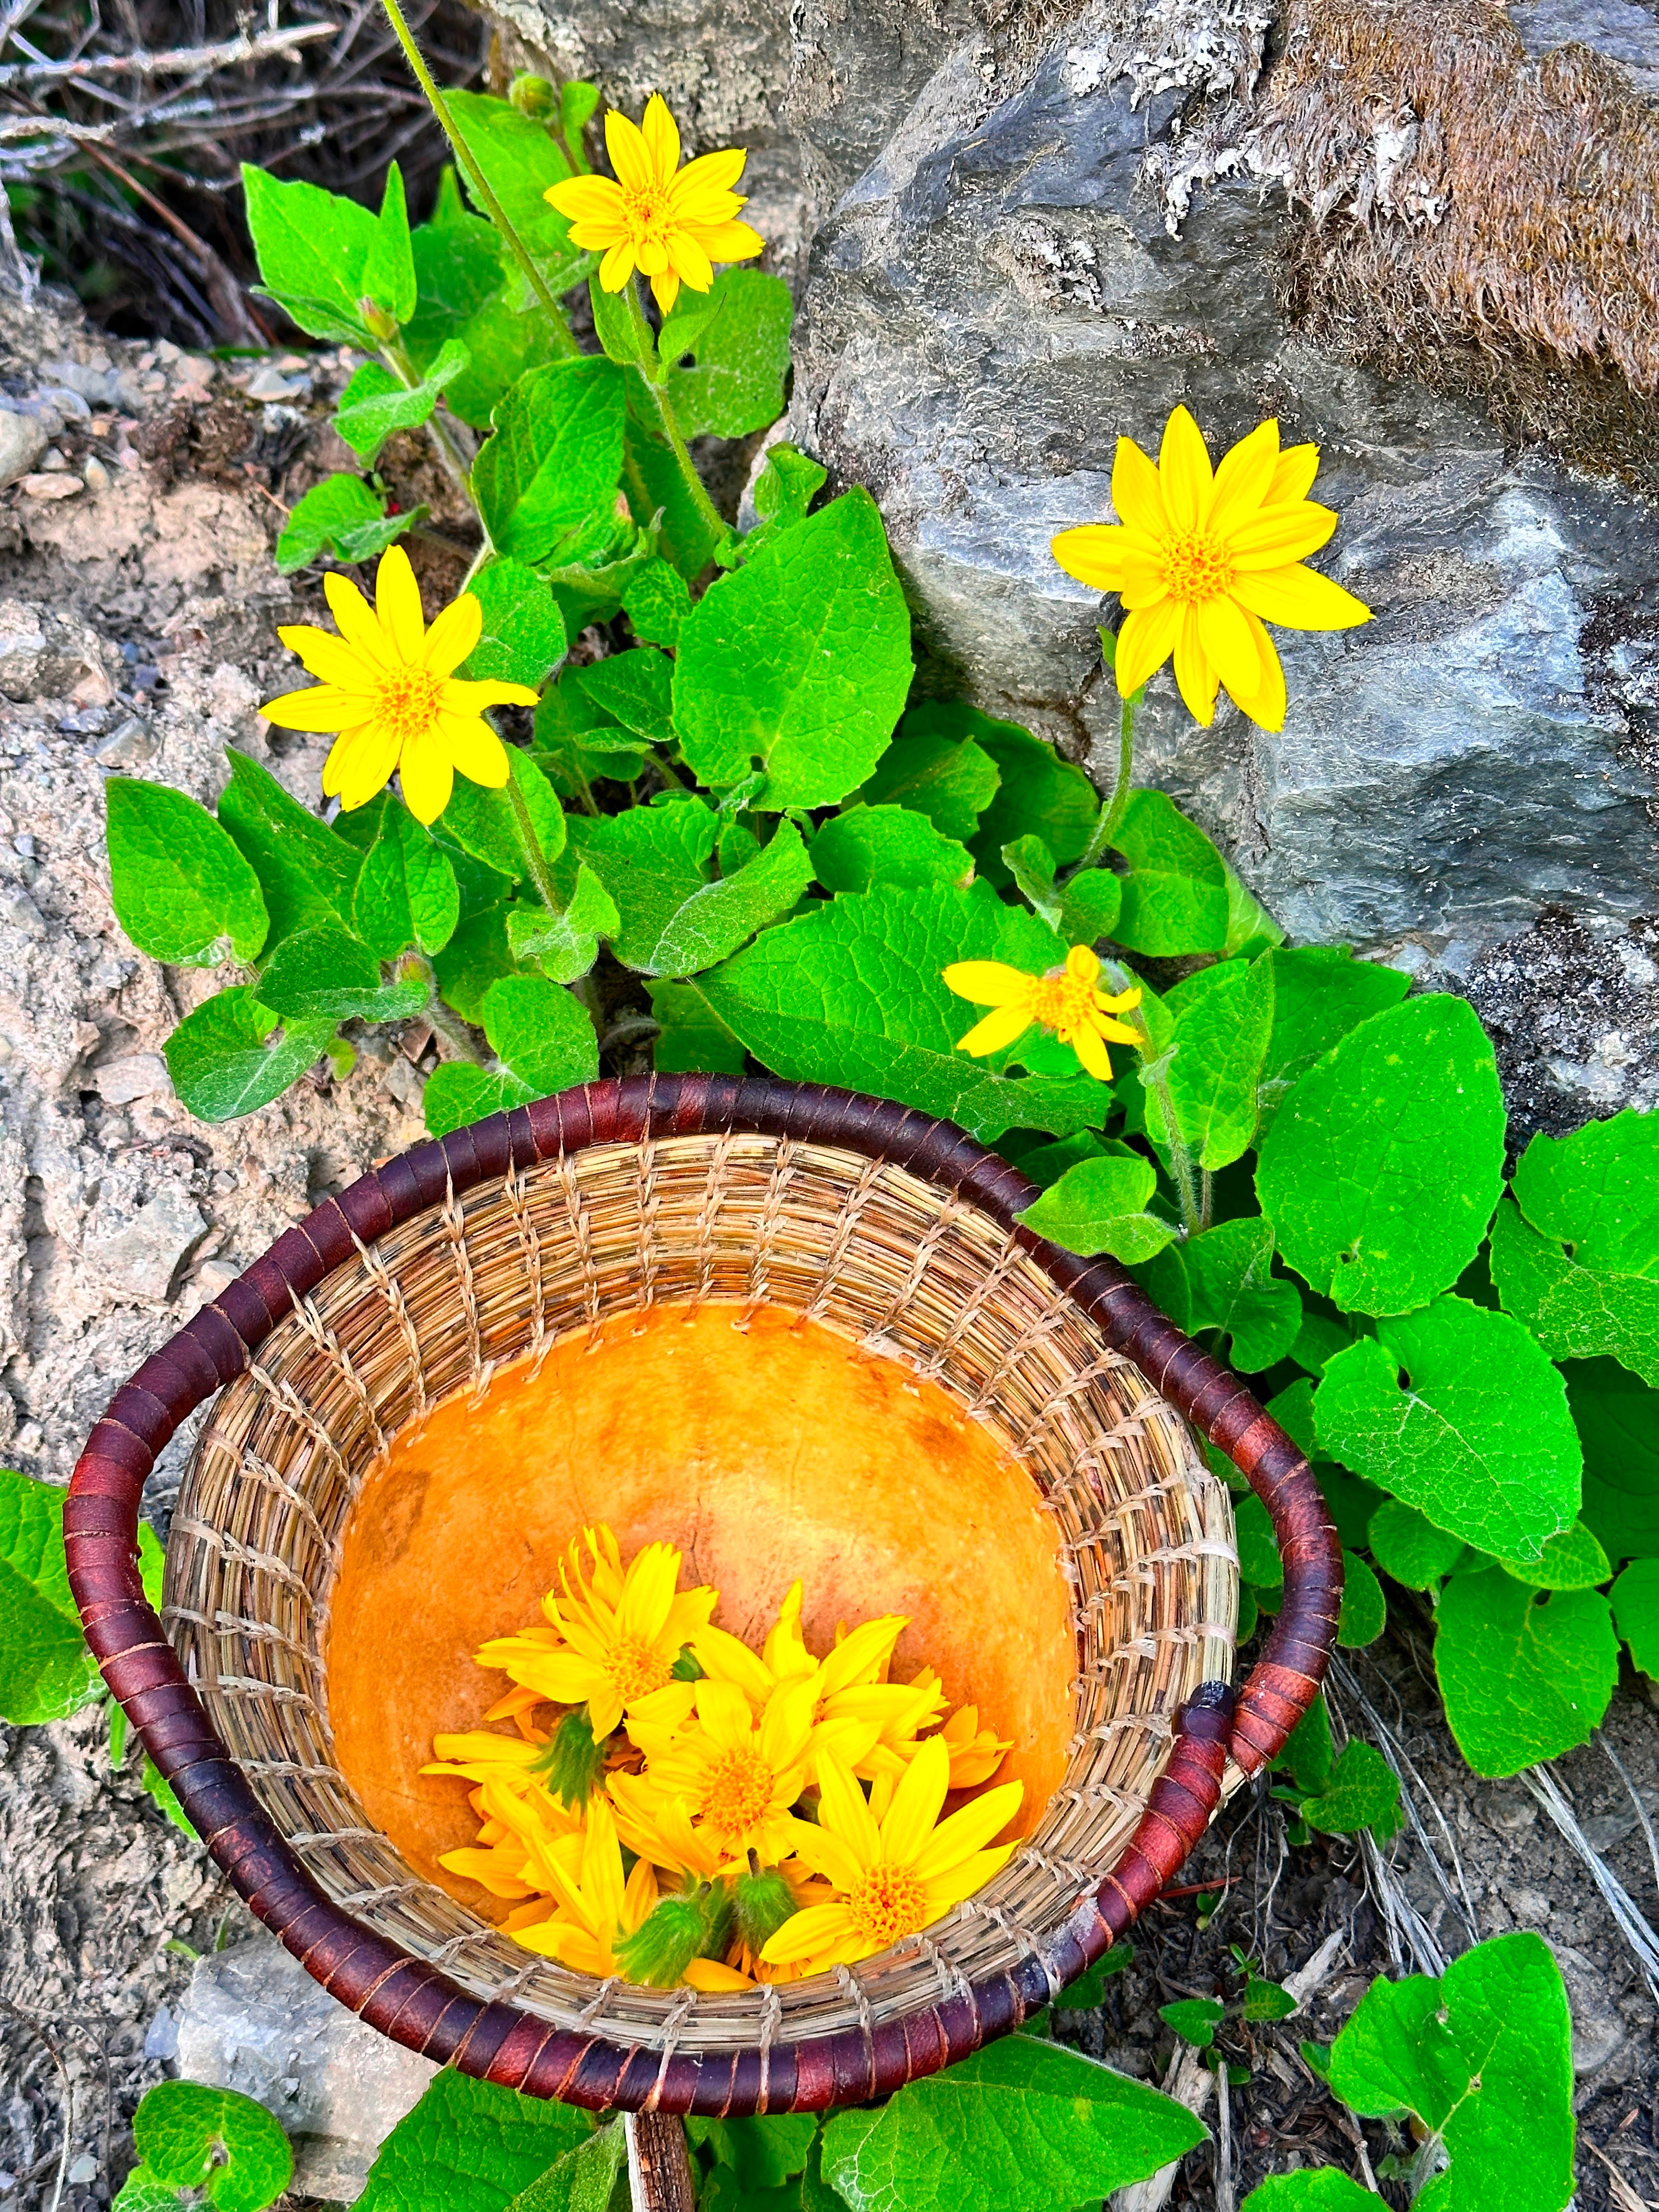
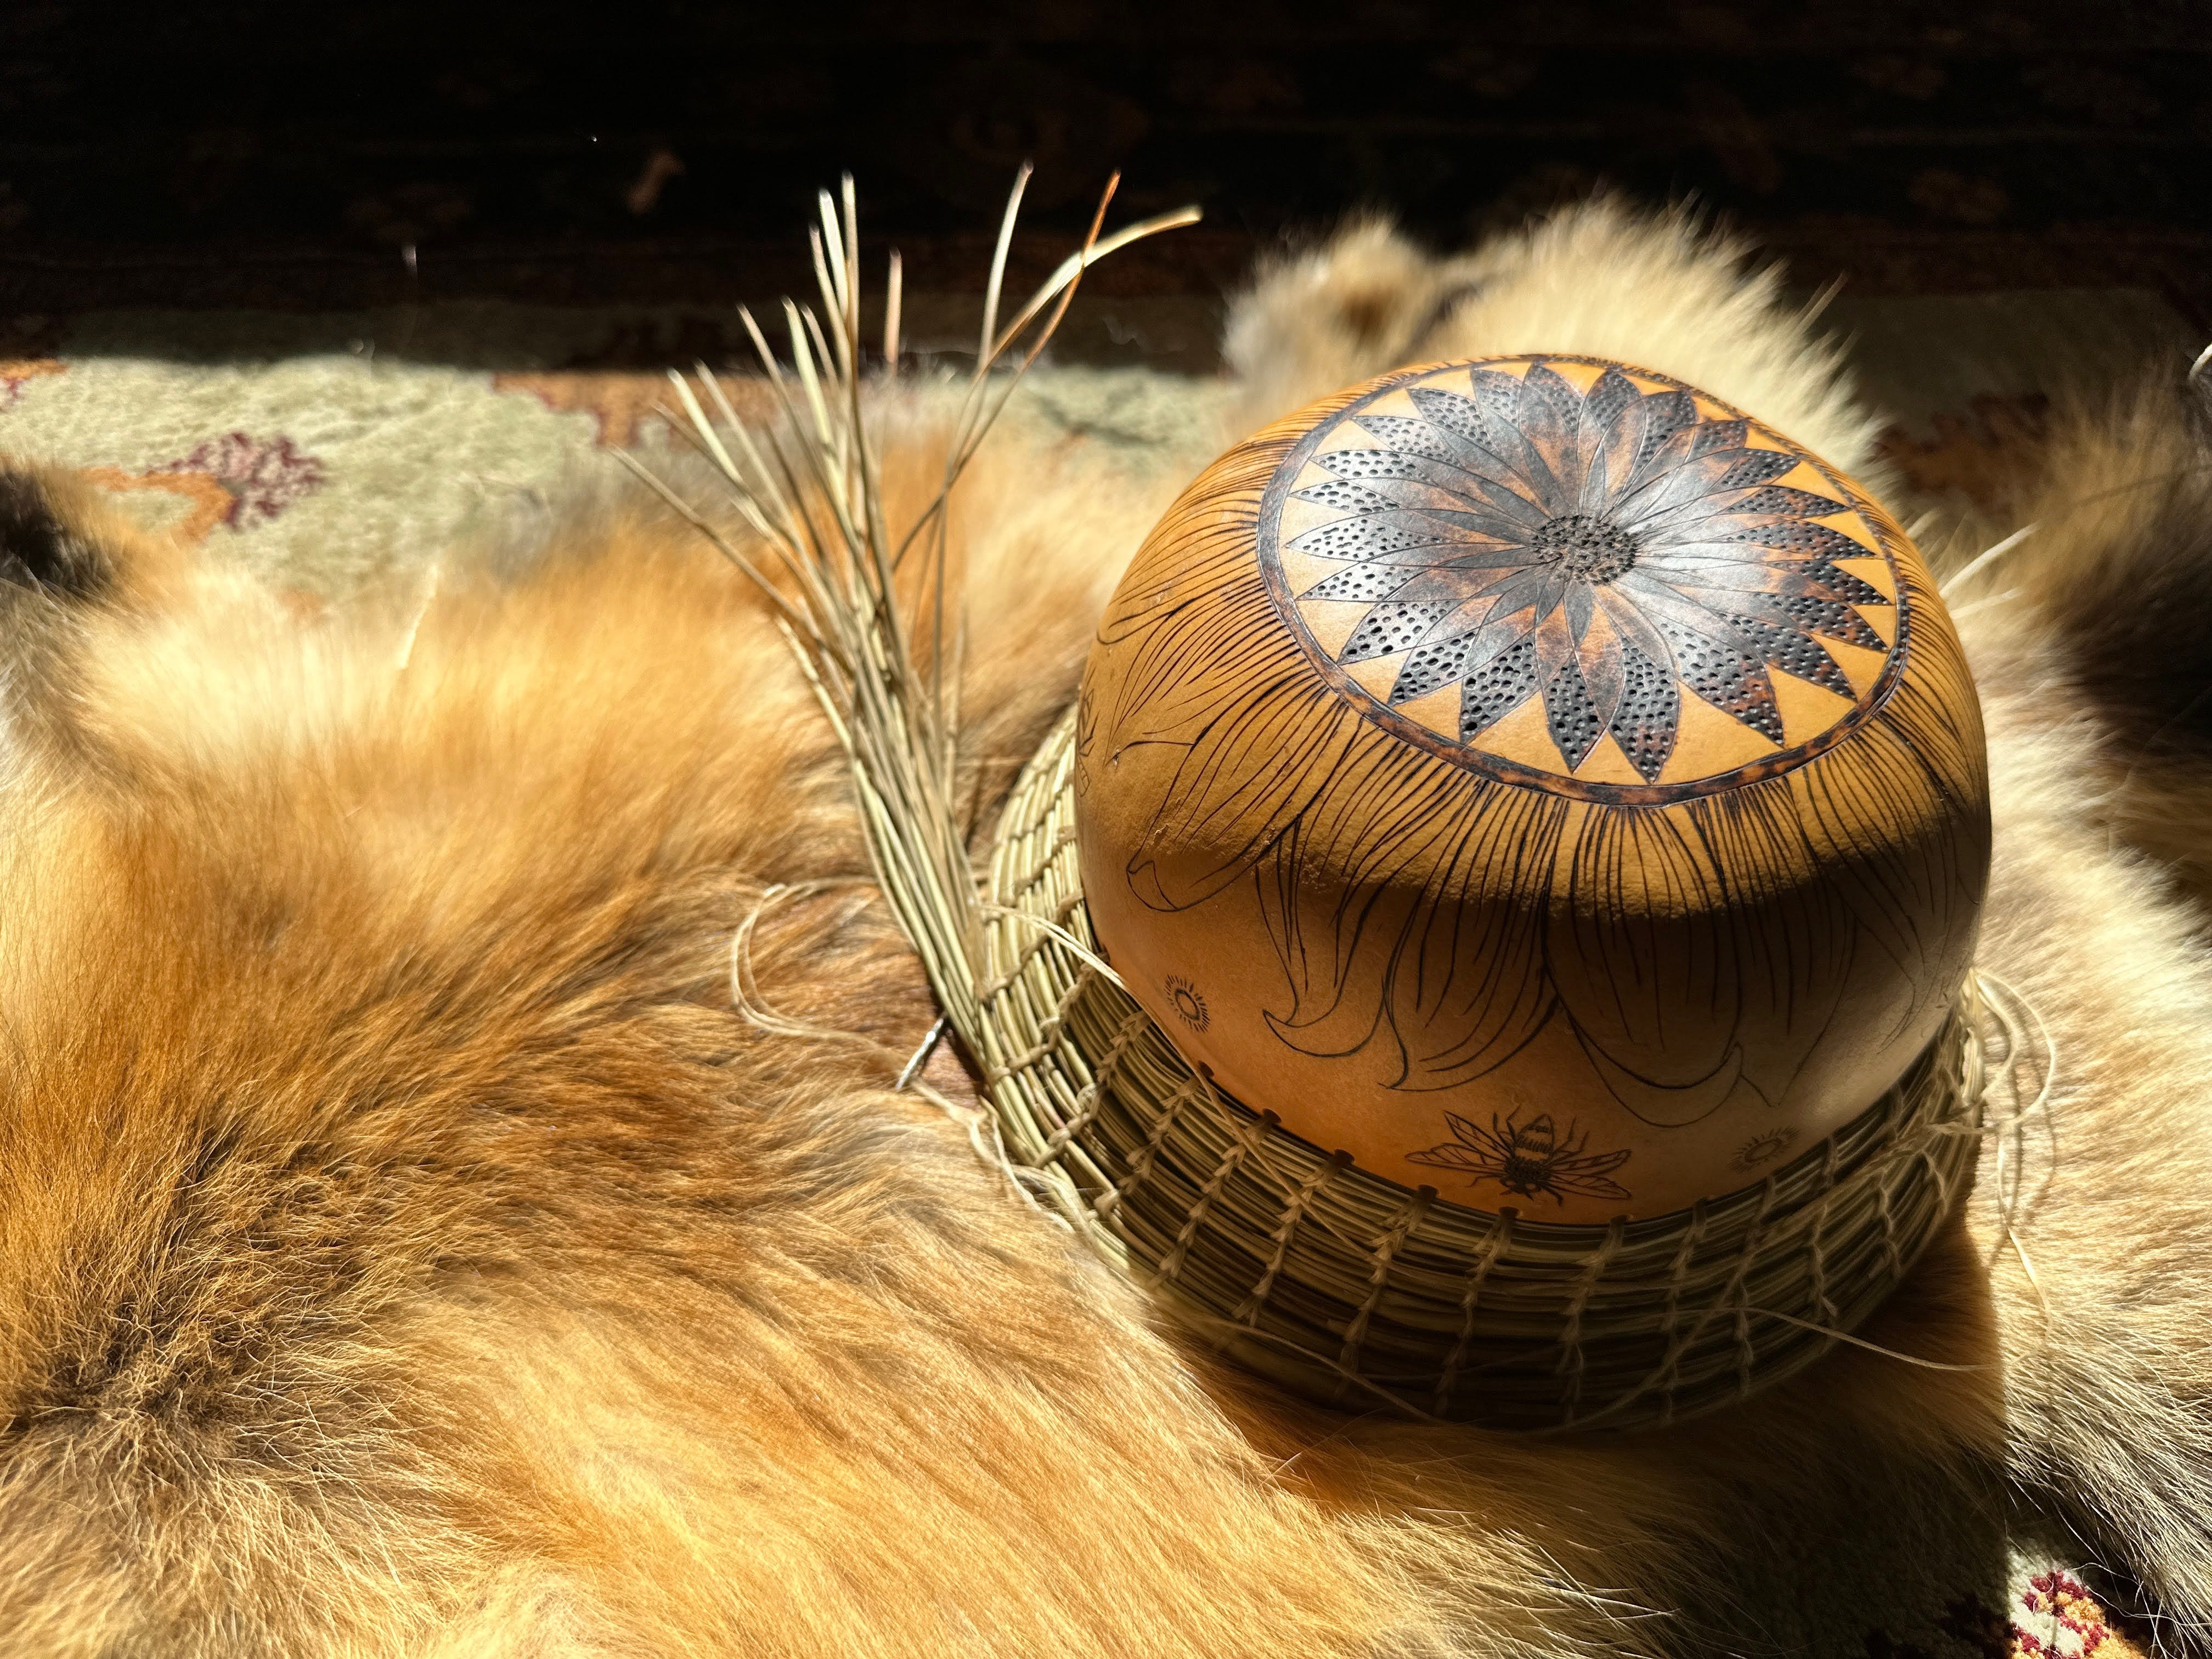
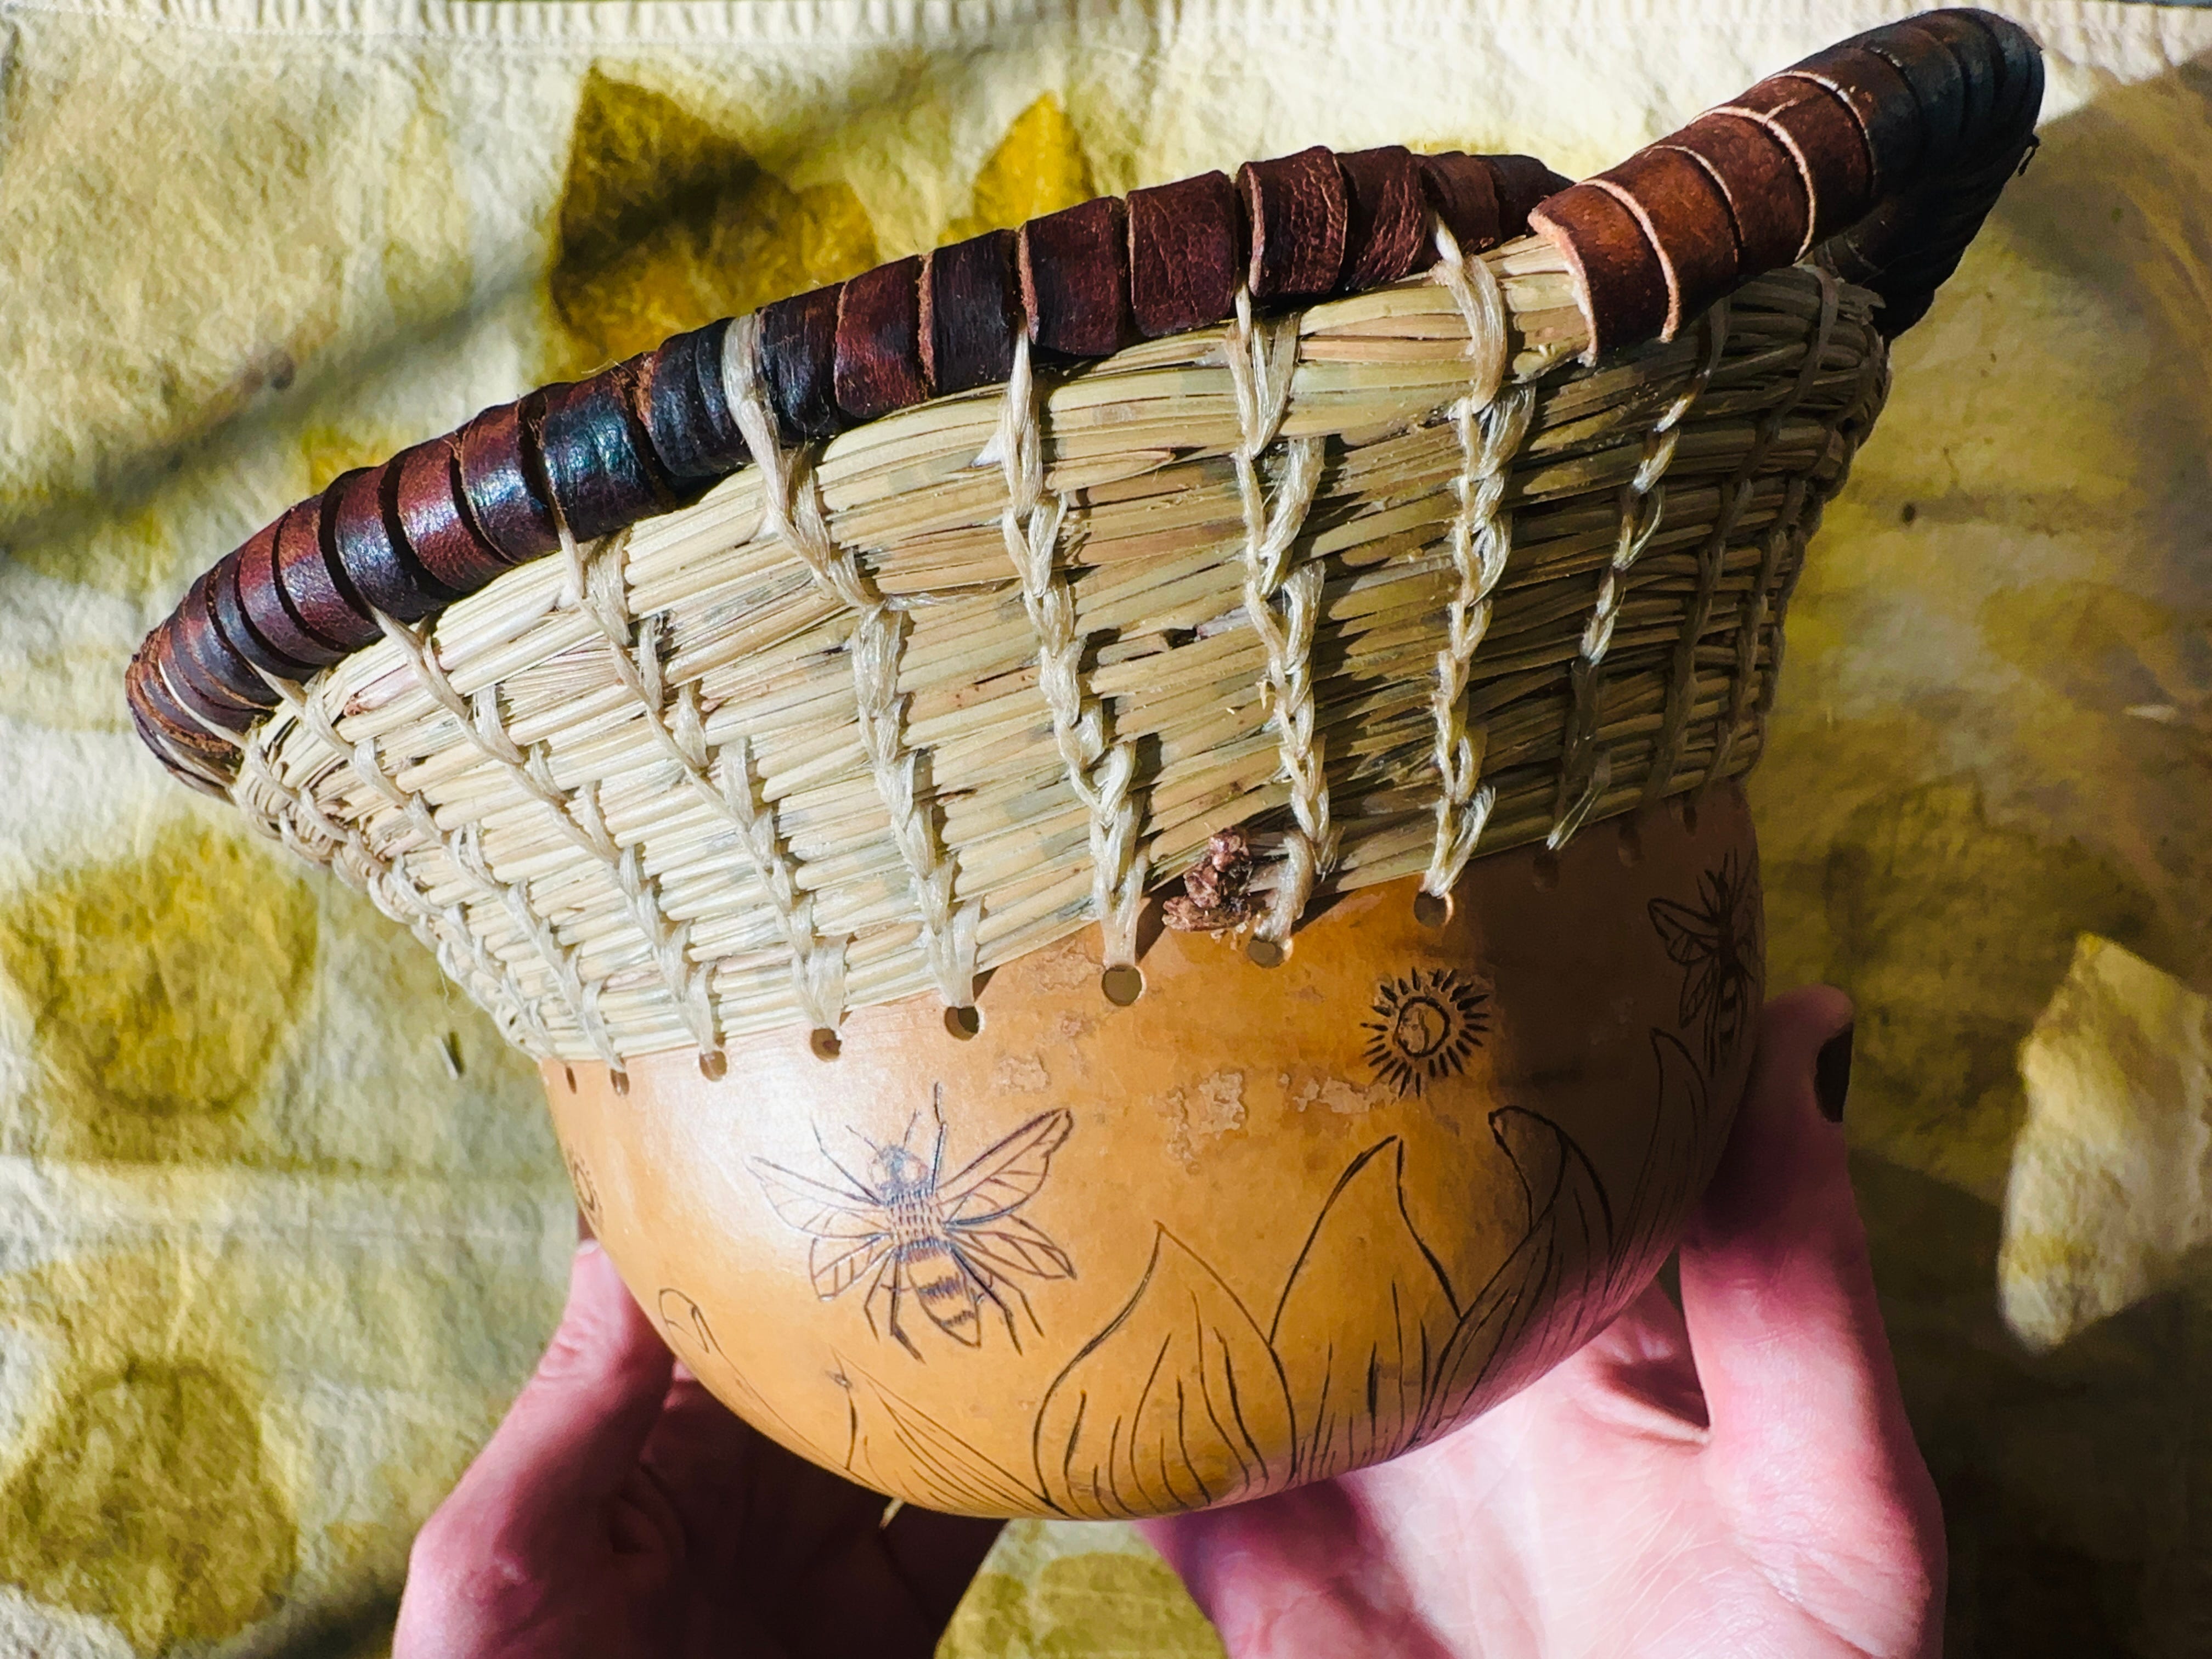
That’s one of the things I love most about this technique: once you understand the basic structure, there are so many directions you can take it.
Pine needles can become a basket on their own; or they can extend gourds, wooden bases, antler, pottery, and other forms. I would love to explore these methods sculpturally. The rim is another opportunity to experiment with material, texture, and color.
And finally, once your basket is completely dry, you can leave it natural or apply a finish. I sometimes use a light coating of beeswax, which gives the pine needles a soft sheen and a little extra protection and strength. Work the wax in sparingly. Warm the wax gently with a hair dryer on low, moving constantly and keeping it several inches away. As the wax softens, buff it into the pine needles with a soft cloth. Add more only if needed.
Enjoy your creation! It should smell divine.
❈
There are truly so many baskets hiding inside this one simple technique, and I hope this tutorial gives you enough confidence to gather a handful of needles and begin.
Like most handcrafts, pine-needle basketry makes much more sense once it is in your hands. Also, there is a learning process. Your first stitches may be uneven, your coil may wander and you may pull something apart and begin again. That is part of learning, and it is normal! I ended up stitching a couple of baskets for this tutorial.
If you make a basket from this tutorial, I would love to see it. Leave a photo or a question in the comments, or tag @Borealfolkways if you share your work elsewhere.
Thank you for learning alongside me.
Keep gathering, keep making, keep passing it on.
Sincerely,
~Lena